MustardOS Artwork
MustardOS Catalogue Structure
MustardOS’s catalogue (which contains information on your ROMs, as well as associated images) is structured as such:
SD1
└─ MUOS
    └── info
        └── catalogue
            ├── <System>
            │    ├── box
            │    │   └── romname.png
            │    ├── preview
            │    │   └── romname.png
            │    ├── splash
            │    │   └── romname.png
            │    └── text
            │        └── romname.txt
            ├── Folder
            │    ├── box
            │    │   └── foldername.png
            │    ├── preview
            │    │   └── foldername.png
            │    └── text
            │        └── foldername.txt
            └── Root
                └── box
                     ├── sd1.png
                     └── sd2.png
These systems match the catalogue= entry in MUOS/info/assign/<system>/global.ini
Folders for all available systems should be automatically created for you.
Example INI file
[global]
name = Atari 2600
default = stella 2014
catalogue = Atari 2600
lookup = 0
governor = ondemand
Here we can see the catalogue folder for this system is Atari 2600.
Matching image files to your content
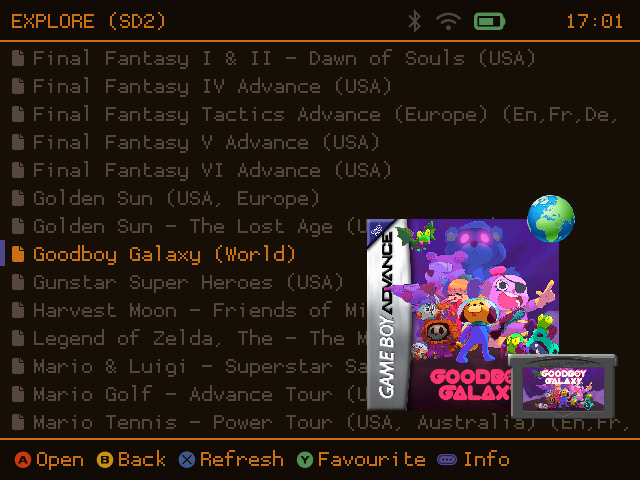
To have your artwork properly show up, ensure these three things:
- Your artwork filename should match the content filename. For example, if you have content called
Chrono Trigger (USA).zip, the artwork filename should beChrono Trigger (USA).png - Your artwork must be placed in the correct location:
box/(for box art) orpreview/(for preview images / screenshots) insideMUOS/info/catalogue/<system>/.- For example, we would store our Chrono Trigger artwork as
MUOS/info/catalogue/Nintendo SNES-SFC/box/Chrono Trigger (USA).png. We useNintendo SNES-SFCbecause as stated earlier, this is the defined catalogue folder name for SNES content.
- For example, we would store our Chrono Trigger artwork as
- Have the correct system assigned to your folder(s).
- MustardOS attempts to assign systems to your folders automatically. But in edge cases where it doesn’t, and you see no artwork being shown, simply navigate to the folder in the content explorer (for example,
Nintendo/SNES/), pressSELECT, and assign a core. Either choose to assign to the directory, or recursively so that all sub folders are also matched.
- MustardOS attempts to assign systems to your folders automatically. But in edge cases where it doesn’t, and you see no artwork being shown, simply navigate to the folder in the content explorer (for example,
MustardOS will check for artwork independently of system sub folders. If your content file is located at
Nintendo/SNES/JRPGs/Chrono Trigger (USA).zip, MustardOS will only check in the root ofMUOS/info/catalogue/Nintendo SNES-SFC/box/, and will ignore sub folders inside the box art folder. So if you place your art inMUOS/info/catalogue/Nintendo SNES-SFC/box/JRPGs, that is incorrect and it will not detect the artwork properly.
Folder artwork
The folder named Folder can be used to apply artwork to any folder in content explorer and just needs to match the folder name.
(not case sensitive). To have folder icons for all subdirectories listed, you would need:
catalogue
└── Folder
    └── box
        ├── nintendo.png
        ├── snes.png
        └── action.png
Advanced Box Art Configuration
Advanced Box Art Configuration allows for overriding how box art is displayed within content explore. Up to 5 images can be displayed. Images are loaded from separate sub folders of /MUOS/info/catalogue/ as defined in the configuration. See examples below.
File Structure
Configuration files must be created in the catalogue folder to enable this feature. You can have one configuration per catalogue folder for example Sega Mega Drive - Genesis.ini. If a configuration file does not exist for the folder then default.ini will be used.
Example File Structure
SD1
└─ MUOS
    └── info
        └── catalogue
            ├── default.ini
            ├── Folder.ini
            └── Sega Mega Drive - Genesis.ini
Configuration File Breakdown
Section [viewport]
The viewport section configures the canvas that all images will be drawn on. Alignment of the view port is controlled by Configuration -> General Settings -> Interface Options -> Content Box Art Alignment
| Setting | Description |
|---|---|
| WIDTH=354 | Width in pixels of the canvase. Setting of 0 will size to content. |
| HEIGHT=0 | Height in pixels of the canvase. Setting of 0 will size to content. |
| COLUMN_MODE=1 | With Column Mode enabled all images are stacked vertically. Image padding can be used to control space between images. |
| COLUMN_MODE_ALIGNMENT=2 | When COLUMN_MODE controls the horizontal alignment of all images. 0=Left 1=Right 2=Center |
Section [image#]
A maximum of 5 image locations can be defined starting with section [image1] to section [image5].
| Setting | Description |
|---|---|
| FOLDER=box | Name of the folder in /MUOS/info/catalogue/ where the image is located |
| ALIGN=2 | When COLUMN_MODE=0 this controls the alignment of the image within the viewport 1=Top Left 2=Top Center 3=Top Right 4=Bottom Left 5=Bottom Center 6=Bottom Right 7=Center Left 8=Center Right 9=Center |
| MAX_WIDTH=0 | Used to resize the image. Maximum Image Width. |
| MAX_HEIGHT=0 | Used to resize the image. Maximum Image Height. |
| PAD_LEFT=0 | Used to adjust position of the image in pixels. |
| PAD_RIGHT=0 | Used to adjust position of the image in pixels. |
| PAD_TOP=0 | Used to adjust position of the image in pixels. |
| PAD_BOTTOM=0 | Used to adjust position of the image in pixels. |
Note: Resizing images using MAX_WIDTH and MAX_HEIGHT settings cause graphical issues like screen tearing while fast scrolling. It is recommended to leave these settings at 0 and instead resize your images to the appropriate size.
Example ini configuration for Column Mode
[viewport]
WIDTH = 354
HEIGHT = 0
COLUMN_MODE = 1
COLUMN_MODE_ALIGNMENT = 2

[image1]
FOLDER = box324x300

[image2]
FOLDER = preview324x300
PAD_TOP = 15
Example ini configuration for Standard Mode
[viewport]
WIDTH = 354
HEIGHT = 480
COLUMN_MODE = 0
COLUMN_MODE_ALIGNMENT = 0

[image1]
FOLDER = box324
ALIGN = 8
MAX_WIDTH = 0
MAX_HEIGHT = 0
PAD_LEFT = 0
PAD_RIGHT = 15
PAD_TOP = 0
PAD_BOTTOM = 0
Example file tree for Column Mode example
└─ MUOS
    └── info
        └── catalogue
            └── <System>
                ├── box
                │   └── romname.png
                ├── preview
                │   └── romname.png
                ├── text
                │   └── romname.txt
                ├── box324x300
                │   └── romname.png
                └── preview324x300
                     └── romname.png
Theme overrides for Artwork
The max width for the text of an item in content explorer is controlled by the theme. This can result in scenarios where the item text is partially covered by the boxart.
You can override this behaviour so regardless of what theme you have installed the text will stop at a defined length. In /theme/override you will find 3 files muxcollect.ini, muxhistory.ini, and muxplore.ini.
If you want to adjust just where the text auto ellipses you can set a value for FONT_LIST_PAD_RIGHT. Example:
[font]
FONT_LIST_PAD_RIGHT = 280

[misc]
CONTENT_WIDTH = -1
If you also want the background bar of the item to resize you would instead adjust CONTENT_WIDTH. Example:
[font]
FONT_LIST_PAD_RIGHT = 10

[misc]
CONTENT_WIDTH = 360

Special Folders
There are three special folders within the catalogue: Application, Archive, and Task.
└─ MUOS
    └── info
        └── catalogue
            └── <special_folder_name>
                ├── box
                │   └── name_of_file.png
                └── wall
                    └── 640x480
                    │   └── name_of_file.png
                    └── 720x720
                        └── name_of_file.png
- Within these folders are the names of the Application, Archive, or Task Toolkit
- These will take precedence over the active theme
If you are distributing an application, archive, or task you could bundle these up too!
antiKk’s MustardOS Artwork
Skraper mixes, and Artwork for the Tiny Best Set are available here:
https://github.com/antiKk/muOS-Artwork